


15 May 2012
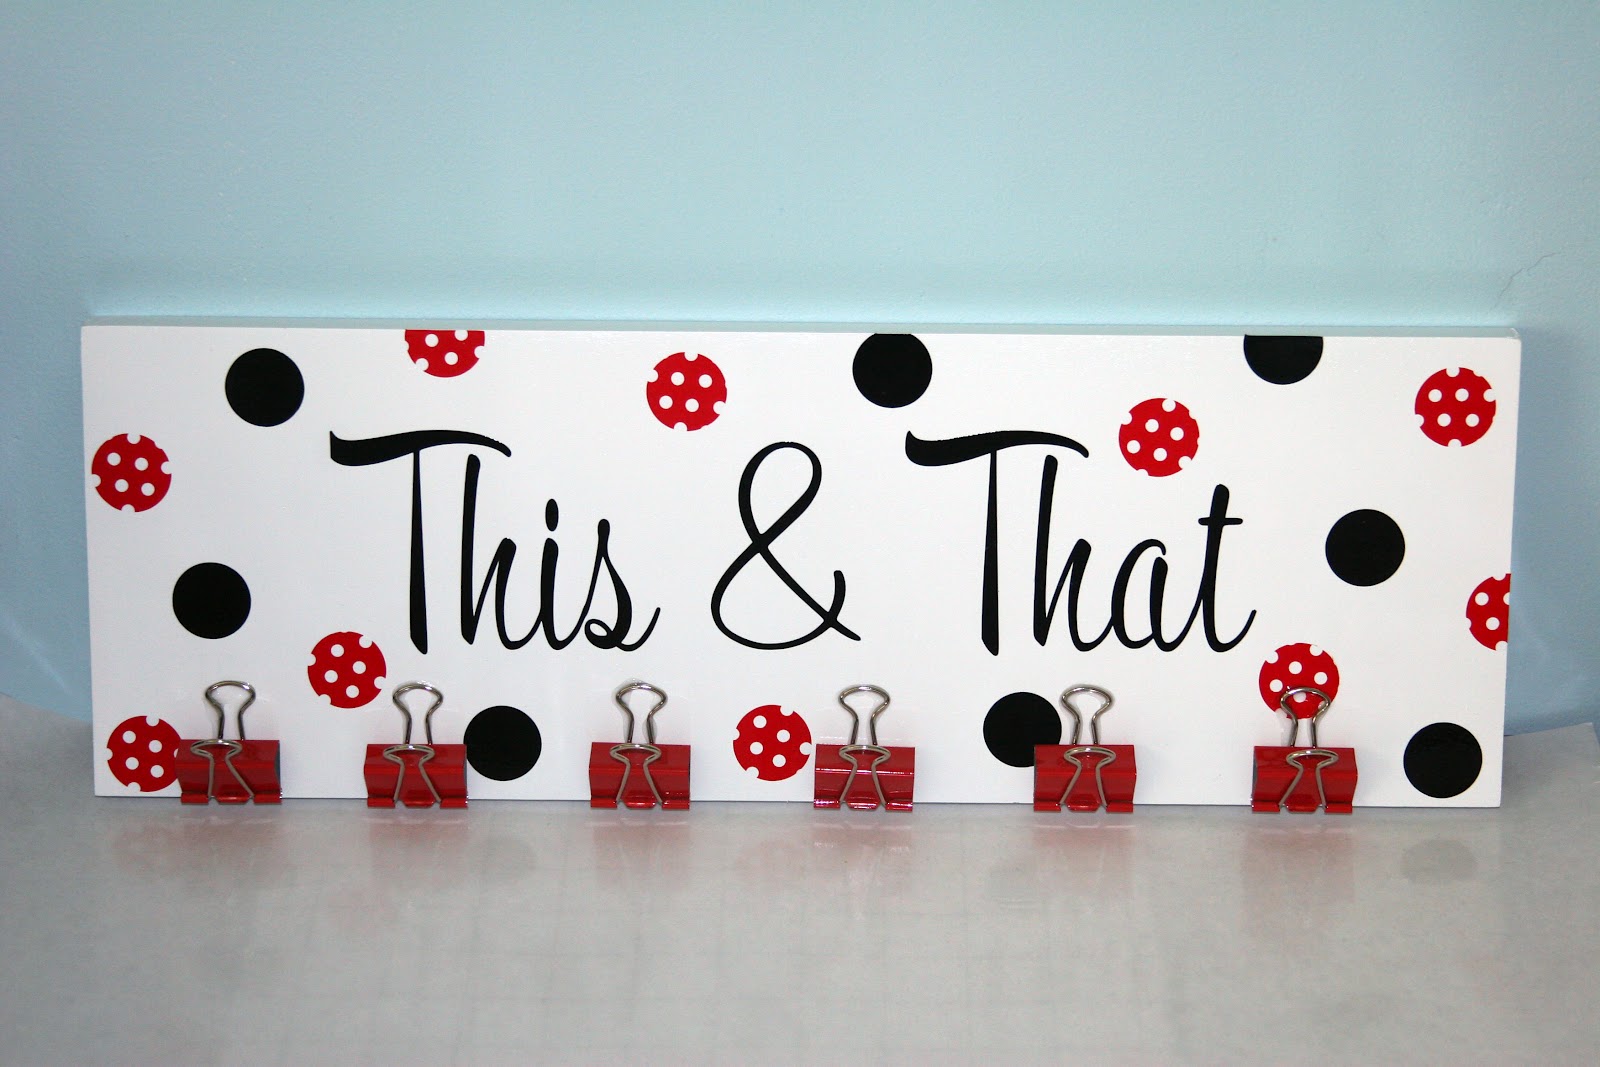
This and That board
05 March 2012
St. Patties Day Pot O Gold


02 February 2012
Snail Mail Box (My Scrap Chick)


**editing to add that the font I used to create the "mail" word-art was "Mail Ray Stuff" it is a free font and I included the link to it on Dafont.
30 January 2012
Jukebox (svgcuts.com)
Welcome back everyone and I am glad to be back too!

 Some of you know (My Facebook Friends) that I started a small vinyl craft business, in October I did my first craft show and I was so busy that I had no crafting time. After the holidays my creative mojo went of vacation! I finally made myself get back into the craft room and this is the first thing I made! This is the 3D Jukebox from the Brand NEW Rockin and Rollin kit from svgcuts.com. Mary has really out done herself and I am going to be making the record box too (I seriously LOVE the dice and glasses) I did the vellum version and I cut my vellum out of the white style vellum and used Alcohol ink in silver to color it, you can still see the battery operated tealight through the vellum. I used a gray paper for the body (to simulate chrome or aluminum) and then did a black and pink theme that is so typical 50's. I just loe the way it turned out and so does my almost three year old (His birthday is Friday 3 Feb.) He kept saying Wow, Wow LOL . Please leave me a comment and let me know what you think!! I will leave you with a few more views from different angles!


22 November 2011
Cuttin Up With Class Family Challenge

15 November 2011
Joy's Life Wintery Puns stamps

08 November 2011
CUWC Thanks Challenge and a Free svg file!

01 November 2011
CUWC Scarecrow Challenge Card

27 October 2011
DigiStampCafe.com digi stamp cards


25 October 2011
Fall Leaf Votives
Fall Leaf Votive
** several folks have asked if the votives are washable, I did a quick test and it looks like if you hand wash, gently, and hand dry they are washable. I did not have any of the alcohol ink come off when I did a test wash.**
I created two fall votives for A Craft Junkie Too Design Team project last year and I wanted to repost them because I have many new followers and recently a new Friend was telling me about these fabulous votives she saw on a blog last year and I had to laugh because they were mine! I love the way they turned out. I created a video so you can see how I made these. They are quick, simple and inexpensive. I am linking these up to the "link up" party over at Cuttin' Up With Class so y'all create your own set and link them up too!! :-)
Please forgive the choppiness of the video, it was over 18 minutes long so I had to get it under the 15 minute limit and I am still learning how to edit! If anyone makes one please let me know, I would love to see them!


 Please leave me a comment letting me know what you think, I love comments and I will confess to constantly checking for them! So, come on and make my day by leaving me a comment!!
Thanks,
Tammy
21 October 2011
Little Scraps of heaven Halloween party Blog Hop

Hello, Welcome to the Halloween Party Blog Hop
We are so glad that you have decided to hop along with us.
Throughout our hop we hope to inspire you with lots of ideas for hosting
your own Halloween Party.
There will be some great blog candy along the way as well as a
GRAND PRIZE GIVEAWAY of $100.00 in cash (which is a big
chunk of change to buy goodies for a Halloween Party)
If you just happened upon my blog and would like to start at the beginning please hop on over to
LEANN'S BLOG
If you have been following the blog hop and have hopped over from Deborah's Blog
Then you are right where you need to be.


Your next stop is Angie's Blog and here is the entire list just in case you get lost along the way! have fun hopping!
Blog Lineup
Leann http://scrapbookingbyleann.blogspot.com/
Patricia http://pattyandcharlie.blogspot.com/
Wendy A. http://scrappydownunder.blogspot.com/
Wendy L. http://wleitel.blogspot.com/
Nancie http://alittlepieceofmebynancie.blogspot.com/
Margaret http://auntmargaretdesigns.blogspot.com/
Emily http://createserendipity.blogspot.com/
Jeana http://www.scraptoday.blogspot.com/
Deborah http://www.scrappingmamma.net/
Tammy http://tammyjennings.blogspot.com/
Angie http://capzscrapzcreationz.blogspot.com/
Cindy http://cpmemories.blogspot.com/
Dawn http://dawnsdesignsthatdelight.blogspot.com/
Tricia http://lshdesigns.blogspot.com/
SVGcuts.com 3D Haunted House


It is part of SVGcuts.com's Elmhurst Hollow SVG Kit. I used textured black cardstock for the main body of the house and some patterned orange from an K & Co. Halloween stack. I added a spider brad, some distressing with Tim Holtz Black Soot distressing ink, and red vellum to the windows. In the back you can place 3 battery operated tealight candles and it is gorgeous all lit up (I did try to take a photo of it lit but they just didn't turn out well.) I used floral wire that I sharpie markered black to attach the bats so they appear to be flying. I am very happy with the way this turned out and it was fairly easy too!
20 October 2011
Cuttin Up With Class Challenge #4

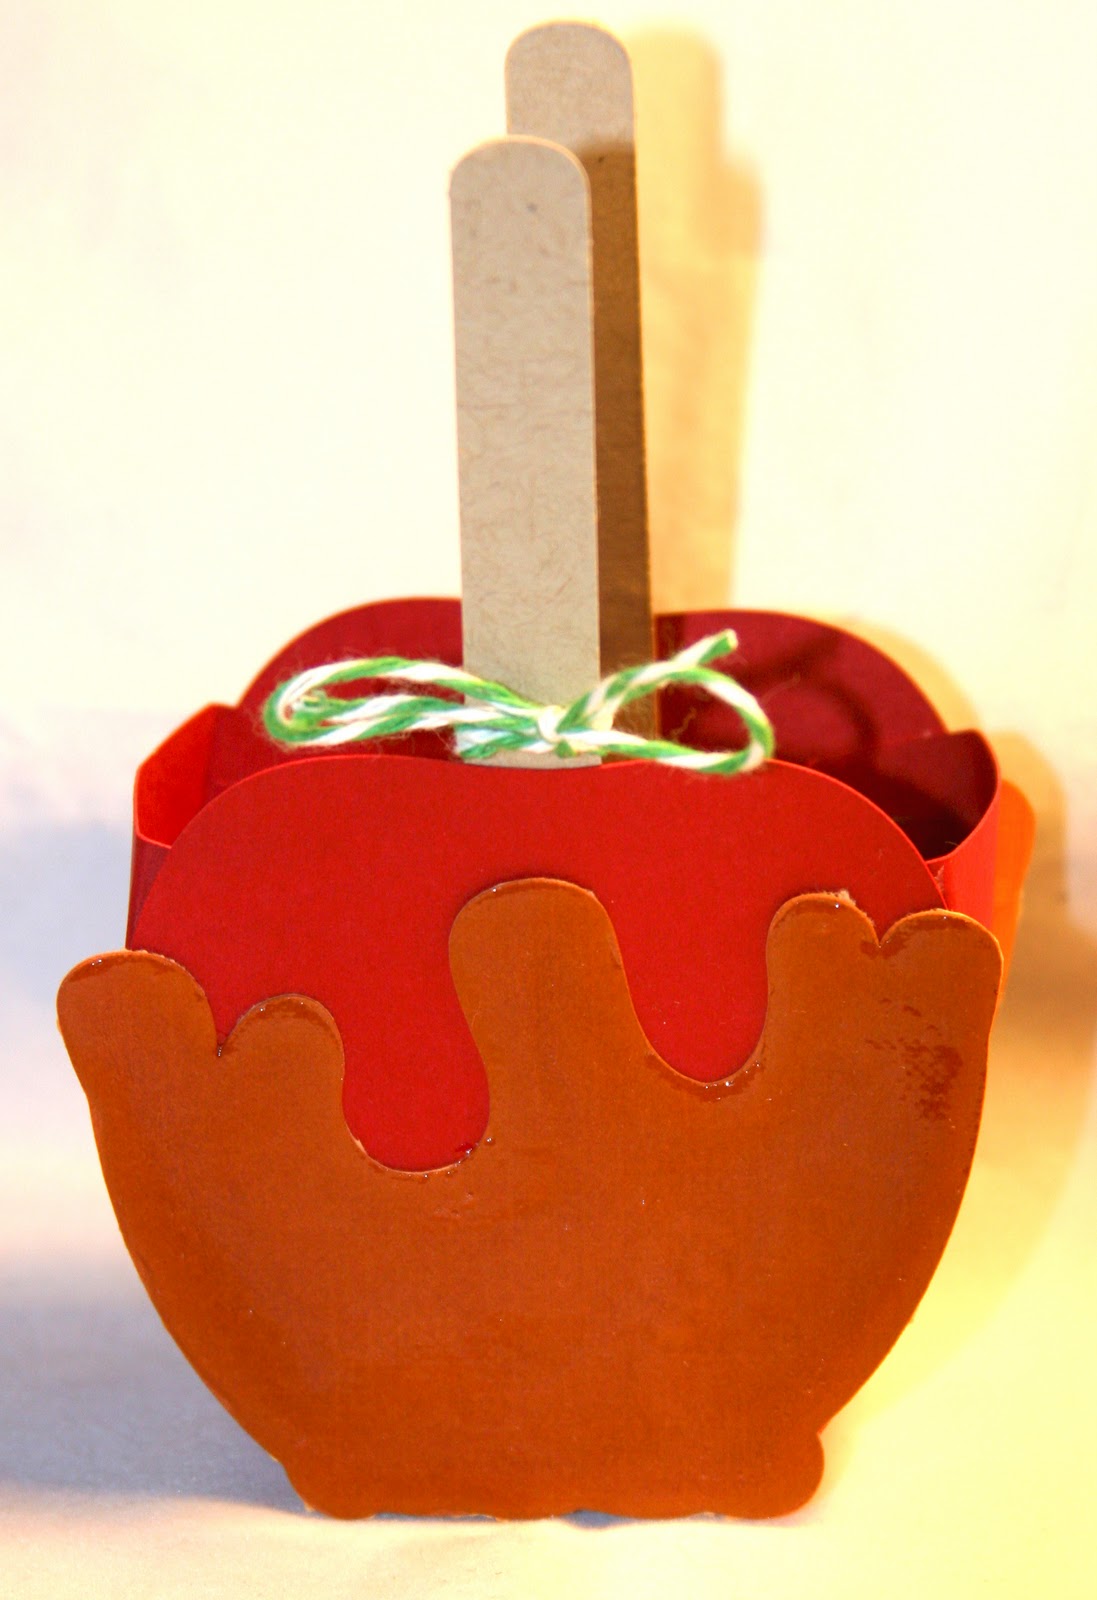
This super cute Caramel Apple Goodie Box was created by the fabulous Jani! I used glossy Accents on the caramel to give it extra dimension. (it is hard to see in the photo) I tied a bit of Trendy Twine around the stick and filled it with Halloween Hershey's Kisses. This weeks Challenge is greatly varied so please go over to the Cuttin Up With Class site and check it out, create a project and link up!! Thanks.
12 October 2011
Happy Fall Y'all - My Scrap Chick

11 October 2011
Cuttin Up With Class Challenge #3 ~ Fall Leaf

Subscribe to:
Posts (Atom)